The main screen is the heart of TimeClick. It’s the first thing employees and admins see when they open the program, and it’s where most daily tasks take place - from clocking in and out to checking messages or entering Admin Mode.
Think of it as your home base. Everything in TimeClick starts here, and this guide will walk you through each section so you know exactly how to use it with confidence.
Here’s what we’ll cover:
- Clocking In & Out
- Employee Search
- Admin Access
- Restricted Admin Access
- Help Bar
- Messages & Notifications
- Update Available Prompt
Let’s get started.
When You First Open TimeClick
The first time you open TimeClick, the main screen may look empty - and that’s completely normal. Once employees are added, their names will appear in a list.
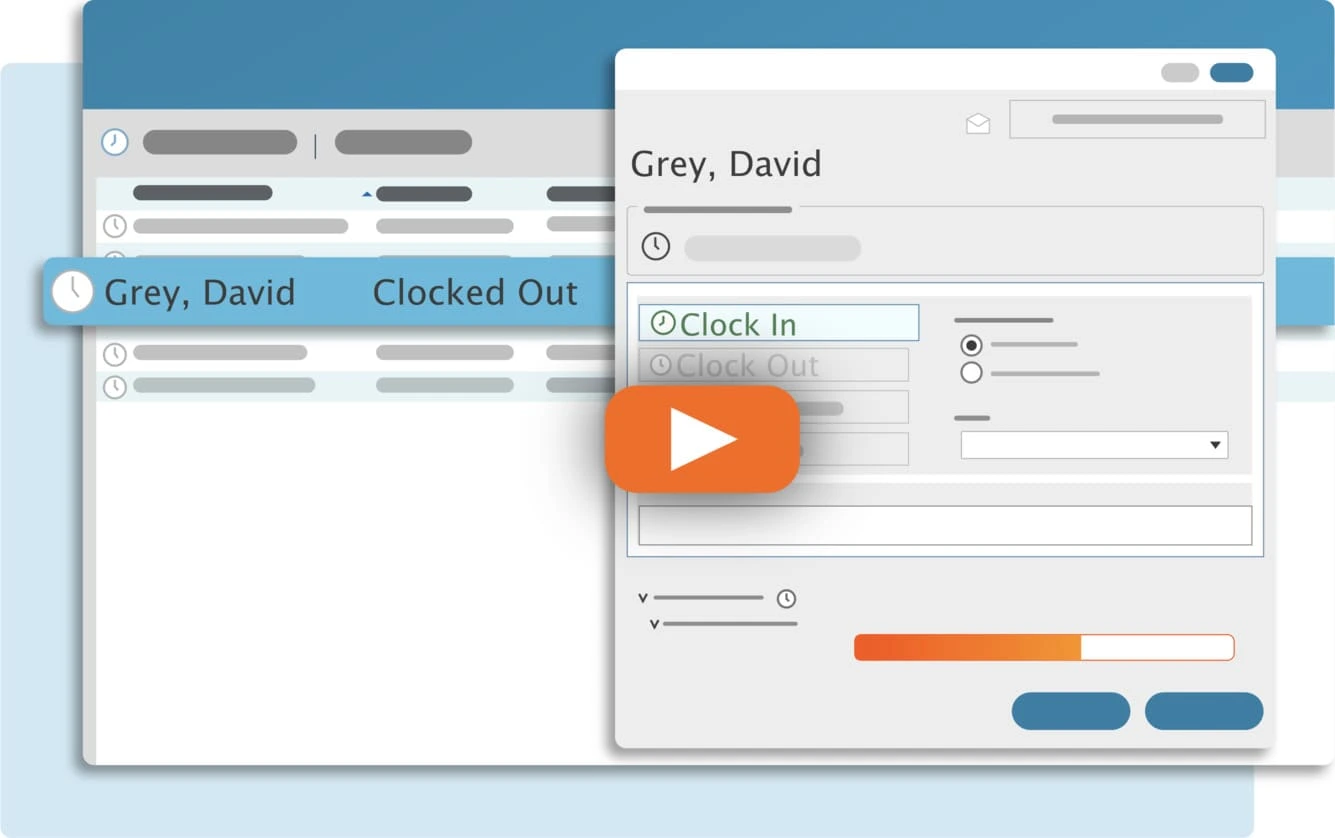
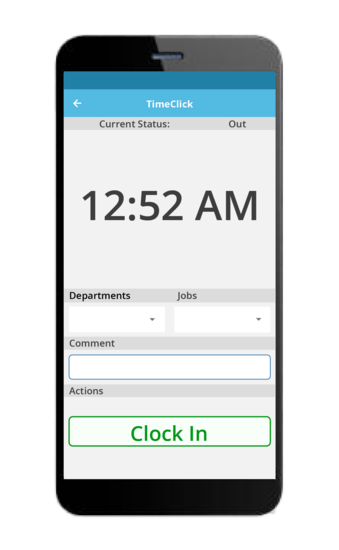
From there, clocking in or out is simple: select your name, enter your password (if required), and click Clock In or Clock Out.
A good way to remember it: the Main Screen is where employees clock time, while Admin Mode is where setup and management take place.
Clocking In & Out

For employees, the main screen is designed to be quick and intuitive. Here’s how to clock in or out:
- Select your name from the list.
- Enter your password (if one is set).
- Click Clock In or Clock Out.
TIMECLICK TIP
If you ever forget to clock in or out, you can submit a Missed Action Request under Employee Options for approval.
Admins can also customize how the main screen looks in Preferences (called Settings in TC 25).
Employee Search
If your employee list is long - or hidden - you can use the search box in the bottom right corner of the main screen. Simply type your name, enter your password, and your clock in/out options will appear instantly.
Admin Access
To open Admin Mode, click the Admin button in the top-right corner of the screen and log in with your admin password.
- Admin Mode - This is the control center for managing TimeClick. From here, you can create employees, edit time records, run reports, configure PTO, and much more. To update the admin password, go to Settings → General within Admin Mode.
- Restricted Admin - Employees with limited administrative rights can log in here. They’ll only have access to the specific features you’ve assigned to them.
TIMECLICK TIP
TimeClick has one main admin account. Anyone with the admin password has full access.
To delegate limited privileges, assign employees as Restricted Admins in Admin → Employees → Edit Employee Record → Restrictions.
Help Bar
At the very top of the main screen, you’ll find the Help Bar - your quick access point for guides, troubleshooting tips, and system information.
- Admin - Log in as an Admin or Restricted Admin.
- System Info - View version details, registration info, and your server IP address.
- TimeClick Guides - Access step-by-step instructions for setup and daily use.
- Top Fixes & How-Tos - Quickly find solutions to the most common issues.
- Need Help? - Opens a guide specific to the screen you’re currently viewing.
TIMECLICK TIP
If you’re using TC 21 or an older version, the Help Bar may look slightly different, but it functions the same. In TC 25, we’ve refined it to be clearer and more intuitive.
Messages & Notifications
In TimeClick 25, messages are located under the envelope icon in the top-right corner of the main screen. This is where admins can view PTO requests, missed clock requests, and employee messages all in one place.
Update Available Prompt
When a new patch is ready, an Update Available prompt will appear on the main screen. Click it to start the update process. Just remember to update your server first, then your client computers to avoid any issues.
Quick Overview
The main screen is the central workspace for employees and the starting point for admins. From here, you can clock in, search for names, review requests, use the Help Bar, or log into Admin Mode - everything is built for speed and simplicity.
Looking to explore further? These guides can help:
- Employee Options Guide - Learn what employees can do beyond clocking in and out.
- Restricted Admin Guide - See how limited admin access works.
- Support Page - Browse deeper guides and Admin Mode walkthroughs.