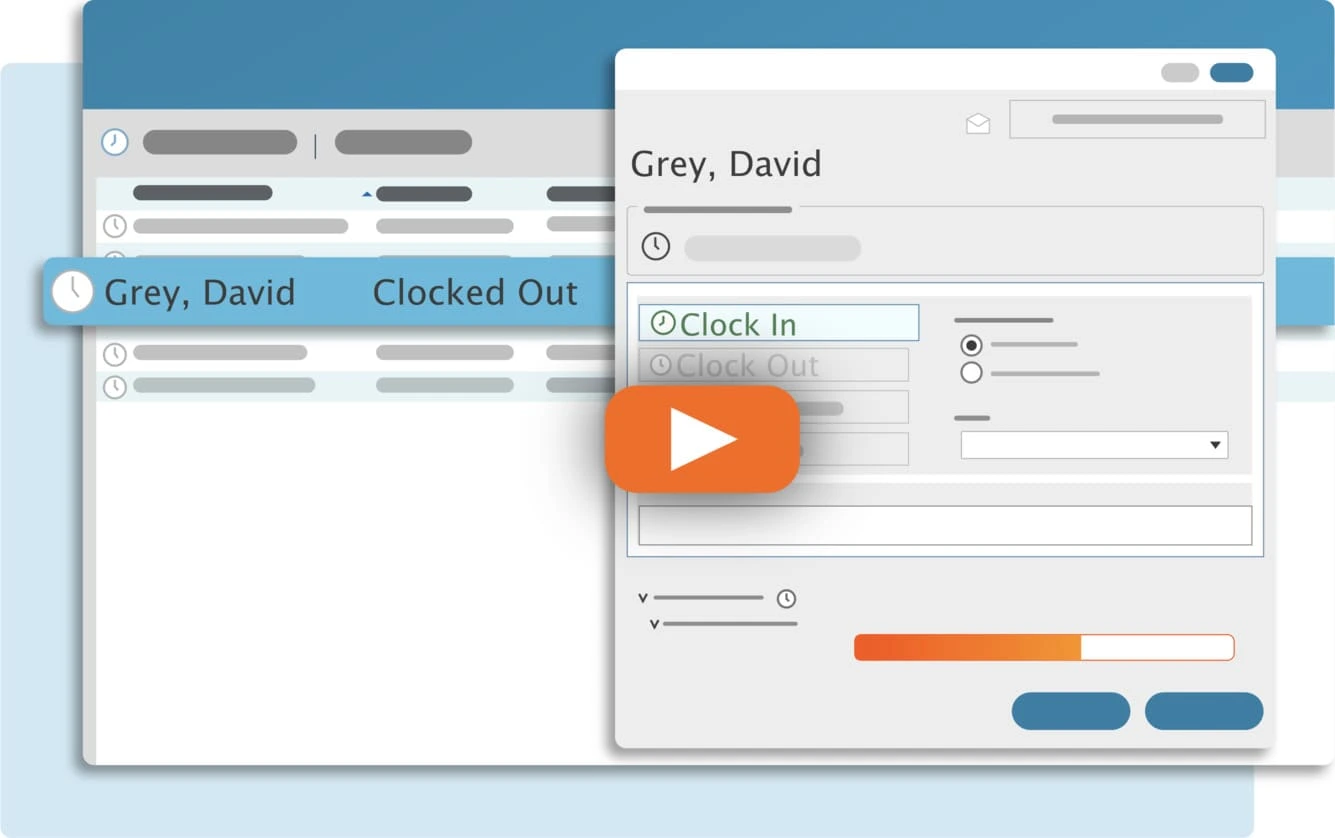
Welcome to the Settings Module
If you’ve ever wanted to fine-tune how TimeClick looks, feels, or calculates your hours, this is the place to do it.
In TimeClick 25, you’ll find Settings by clicking the gear icon in the top-right corner while in Admin Mode. In TC 21 and older, this section was called Preferences.

The Settings module lets you customize things like:
- Breaks
- Pay Periods
- Overtime Rules
- Main Display Options
- Admin Password
- Custom Time Types
There are six main tabs in total - here’s what each one does.
Table of Contents
General
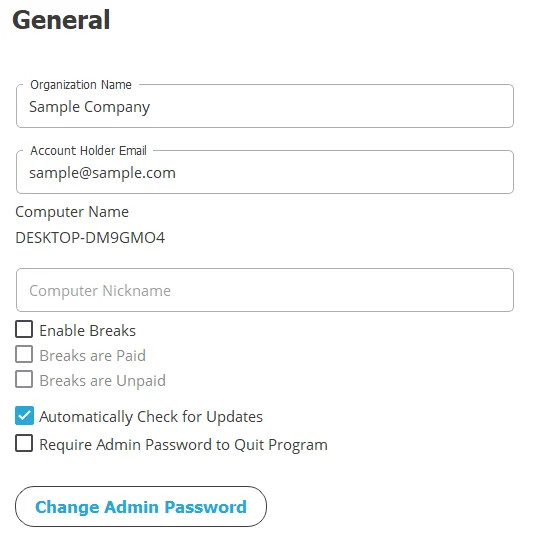
This tab covers your company-level basics. Here, you can:
- Change your company name (as it appears on reports)
- Update your main account email
TIMECLICK TIP
This does not change your billing or contact email with TimeClick. To update that, email support@timeclick.com.
- Give your computer a nickname (helpful for identifying devices)
- Turn paid or unpaid breaks on or off
- Disable auto-updates if needed
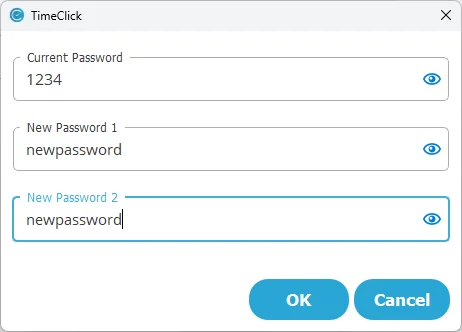
- Change your Admin password
Display
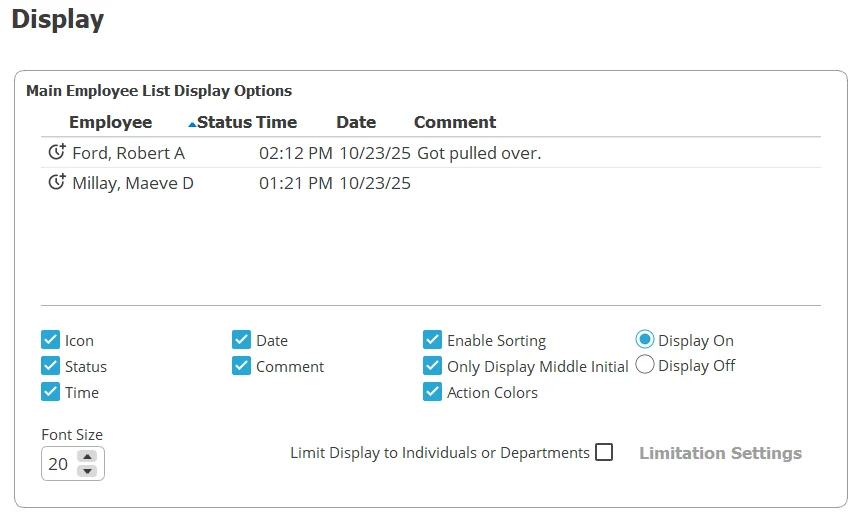
This tab controls how TimeClick looks on the main screen. By default, your display shows:
- Employee first and last name
- Latest entry (clock in or clock out)
- Time and date of that entry
- Comment (if added)
You can remove or keep any of these items - or customize them for each workstation. If your office has multiple departments, you can check “Limit Display to Individuals or Departments” to show only selected employees on each computer.
At the bottom, you’ll also choose whether to:
- Apply the display settings only to this workstation, or
- Apply them to all workstations

Pay Period & Overtime
This tab is all about your pay periods and overtime setup.
Start by entering your most recent pay period, then click Save - TimeClick will automatically track your ongoing schedule.
You can also choose whether your reports default to the last or current pay period. This doesn’t change your data - it just saves time when generating reports.
Below that, set your overtime thresholds for:
- Weekly
- Daily
- Double-time
Most states use 40 hours per week as the standard overtime threshold. Check our Overtime Laws Guide to confirm your state’s requirements.
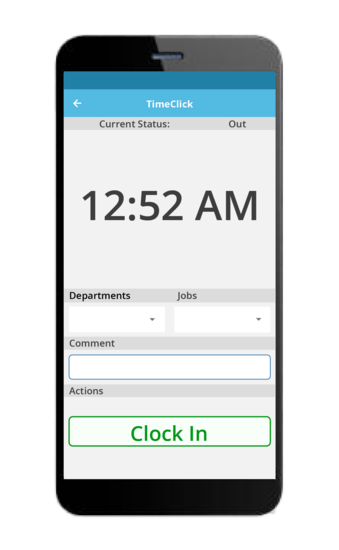
Mobile
If you’re using the TimeClick Mobile app, this tab is where you’ll configure it. Just follow the on-screen instructions or visit our full guide:
Your Guide to TimeClick Mobile
Advanced
This tab is simple - it lets you choose which module TimeClick opens to by default when you enter Admin Mode.
Time Actions
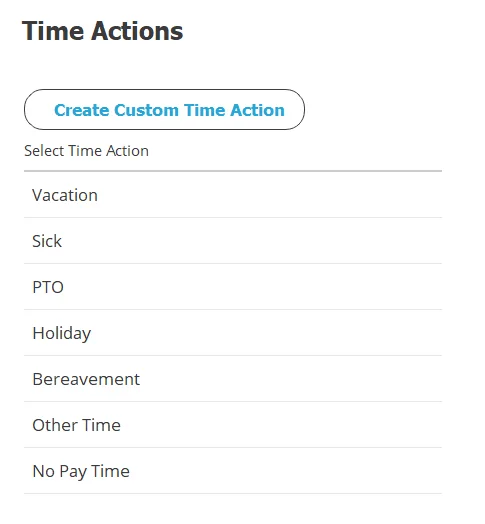
Here, you can create custom types of time entries to fit your company’s needs.
Default options include:
- Vacation
- Sick
- PTO
- Holiday
- Bereavement
- Other Time
- No Pay Time
If you need something more specific - like “Bonus Time” or “Training Hours” - you can create it here. Once saved, these options will appear in Modify Times for assigning to employees.
Only PTO, Vacation, and Sick can accrue automatically. For details on that setup, check out our Accrued Time guide or the Accrued Time module.
Custom Time Options
When creating a custom time type, you’ll see three checkboxes:
-
Include in Totals Calculations – Adds this time type to total paid hours on reports.
Example: 32 hrs Regular + 8 hrs Bonus Time = 40 hrs Total
-
Include in OT Calculations – Allows this time type to count toward overtime totals.
Example: 33 hrs Regular + 8 hrs Bonus Time = 40 hrs + 1 hr OT
-
Counts as Present (for Attendance) – Marks the employee as present on the Attendance Report if this time type is logged that day. This is only relevant if you use the Attendance Report found in the Report Center or Dashboard modules.
Wrap-Up
That’s it for the Settings module! You can now:
- Customize how TimeClick looks and operates
- Define your pay periods and overtime rules
- Set up mobile access
- Create custom time types to match your business needs
Once these settings are dialed in, TimeClick will run exactly how you want it to - every time.